Showing posts with label mini albums. Show all posts

Friday, June 27, 2025

🧵 Stitching in Art Journal Pages: Adding Text and Words to Your Art


🧵 Stitching in Art Journal Pages: Adding Text and Words to Your Art

When words meet thread, something magical happens.

Incorporating stitching into your art journal isn't just about texture—it's about storytelling. It’s a beautiful way to slow down, reflect, and give your pages a deeply personal, handmade touch. And when you use stitches to add words or text, your art becomes even more expressive.

Why Stitch Words Into Your Art Journal?

Most of us are used to writing or painting words on our pages. But stitching? It adds another layer—both visually and emotionally. Each letter, formed stitch by stitch, invites mindfulness. It creates intimacy and intention.

Plus, it's tactile! You can feel the texture. See the shadows. Watch thread weave meaning into your background.

What You’ll Need:

You don’t need fancy supplies to start stitching in your art journal. Just a few simple tools:

  • Needle (sharp enough for paper or fabric)

  • Embroidery thread or fine yarn

  • Awl or push pin (to pre-punch holes if working on thick paper)

  • Pencil (for sketching your word)

  • Fabric scraps (optional, for added texture)

  • Washi tape or fabric glue (to secure threads on the back)

Tip: Use lightweight paper or fabric layers if you're worried about tearing your journal pages.

How to Add Stitched Words to Your Pages

  1. Choose Your Word
    Pick a word that resonates with your page’s theme or your mood—like “breathe,” “hope,” or “grow.” You can also use short phrases or even stitched quotes!

  2. Sketch it Out
    Lightly draw your word where you want it to appear on the page. Use cursive or block letters—whatever matches your style.

  3. Pre-Punch the Holes
    Use an awl or push pin to make small holes along the lines of your letters. This makes stitching easier and keeps the paper from tearing.

  4. Start Stitching!
    Thread your needle and start sewing through the holes. A simple backstitch works great for most words. Don’t worry about perfection—it’s all about expression.

  5. Secure the Thread
    When finished, tape or glue down the thread ends on the back of the page so they stay put.

Ideas for Using Stitched Text

  • Highlight a quote that inspires you

  • Add a single word as the focal point

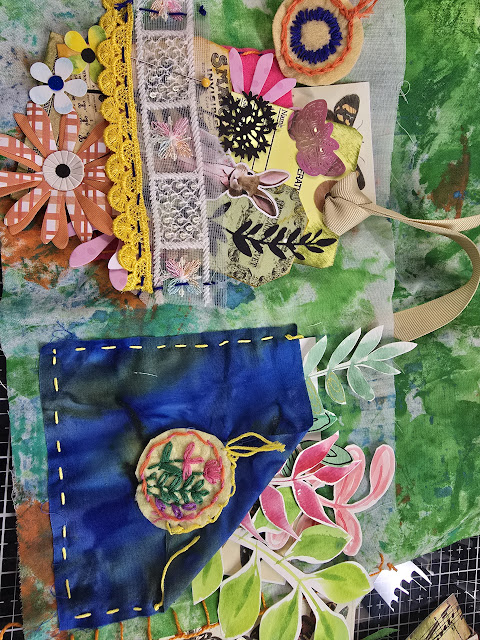
  • Stitch over fabric scraps for layered effects

  • Use thread color to match your theme or mood

A Slower, More Meaningful Process

Stitching words forces you to slow down, and that’s a good thing. It becomes a meditative practice. One letter at a time, your message unfolds—not just for the viewer, but for yourself.

You don’t need to be an expert in embroidery or sewing. Even the most basic stitches bring charm and character to your work. And over time, your confidence (and stitch vocabulary) will grow.

Monday, June 23, 2025

Common Stitch Types for Art Journals and the Best Fabrics to Use


🧵 Common Stitch Types for Art Journals and the Best Fabrics to Use

If you’ve ever wanted to bring more texture, story, and soul into your art journal, fabric and hand stitching can be a beautiful way to do it. Whether you’re creating a fabric journal from scratch or adding stitched elements to your mixed media pages, understanding a few basic stitch types and fabric choices can open up a whole new world of creative expression.

✨ Why Add Stitching to Your Art Journal?

Stitching adds dimension, texture, and a deeply personal touch to any journal page. It slows you down (in the best way), encourages mindful making, and allows you to literally "draw with thread." Each stitch becomes a mark of time, thought, and story.


🧵 Common Hand Stitch Types for Art Journals

You don’t need to know hundreds of techniques — just a few versatile stitches can get you started and go a long way.

1. Running Stitch

A simple up-and-down stitch that creates a dashed line. It’s great for outlines, borders, and attaching fabric to paper.

2. Backstitch

Stronger than the running stitch and perfect for writing with thread, outlining shapes, or stitching on heavier fabric.

3. Straight Stitch

One of the most versatile stitches — can be scattered for texture, grouped in patterns, or used as filler.

4. French Knots

Beautiful little dots that add texture and dimension. Ideal for creating tiny florals, decorative details, or visual accents.

5. Blanket Stitch

A classic edge stitch that works wonderfully to secure fabric around the edges of a journal page or patch.

6. Chain Stitch

Looks like a little chain and is perfect for borders, vines, or whimsical lines.


🧵 Best Fabrics to Use in Art Journals

Choosing the right fabric makes a big difference when you’re combining textiles and paper.

🌿 Muslin or Calico

Affordable, easy to stitch through, and perfect for dyeing or painting. A great base fabric for journaling.

🌾 Linen

Has a beautiful texture and natural look. Slightly more open weave, so great for hand stitching.

👕 Upcycled Cotton

Old shirts, pillowcases, or baby clothes — cotton is soft, easy to sew, and adds a personal touch to your journal.

🧣 Silk or Organza

For transparent, ethereal layers. Use with care — they can be delicate, but they add stunning effects.

🧼 Tea-Stained or Dyed Fabrics

Pre-treat your fabrics with natural dyes, inks, or tea for a vintage, earthy feel that adds instant depth to your pages.


🧵 Tips for Stitching in Art Journals

  • Use embroidery thread or perle cotton for bold stitches and visible lines.

  • Pre-punch holes if stitching directly on paper to avoid tears.

  • Layer fabric over watercolor or collage for mixed media magic.

  • Work on loose pages before binding if you're planning a thick stitched design.


✂️ Stitch Your Story

Every stitch tells a story — of memory, mood, or meaning. As you play with thread and fabric in your journal, remember: there are no rules. Whether you're slow stitching as meditation or using it to hold scraps and secrets together, your fabric journal becomes a living, tactile archive of your creative journey.

What stitch will you try first?


Friday, June 20, 2025

Beautiful Stitching Techniques for Art Journals


 Stitching in Art Journal Pages

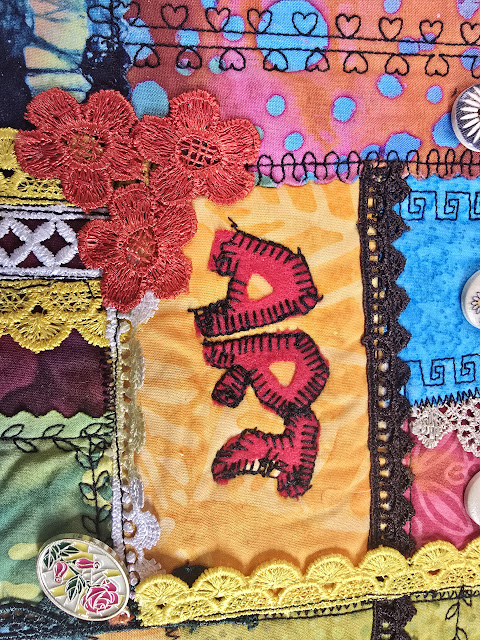
Stitching is a popular and expressive technique in art journaling, adding tactile texture, visual depth, and personal meaning to your pages. It can be done by hand or with a sewing machine, and offers a wide range of creative possibilities.

Benefits and Effects of Stitching in Art Journals

·         Adds texture and dimension, transforming flat pages into tactile works of art.

·         Creates a sense of connection-both between materials and between your thoughts and the physical page.

·         The process can be meditative, encouraging mindfulness and intentionality with each stitch.

·         Stitches can be symbolic, representing emotions, moments, or connections within your journal spread.

Common Stitch Types for Art Journals

Here are some popular stitches and their uses in art journaling.

Stitch Type

Description & Use

Running Stitch

Simple, straight stitches for outlines, borders, or subtle texture

Backstitch

Solid, continuous line for outlines or writing words directly on the page

Cross Stitch

Decorative “X” shapes for patterns or filling areas with color

French Knot

Small, raised knots for accents like flower centers or stars

Blanket Stitch

Looped border for finishing edges or framing sections

Whip Stitch

Twisted, rope-like stitch for attaching elements or joining layers

Chain Stitch

Looped, chain-like line for flowing curves or movement

Satin Stitch

Dense, smooth fill for blocks of color or focal points

Seed Stitch

Scattered, tiny stitches for organic background texture

Abstract Stitch

Freeform, irregular stitches-often with fabric scraps-for expressive effects


Techniques and Tips

·         Hand Stitching vs. Machine Stitching: Both methods are effective. Hand stitching offers more control and intimacy, while machine stitching is faster and can create decorative effects with built-in patterns.

·         Materials: You can stitch directly on paper, fabric, or a combination. Use embroidery thread, topstitch thread, or even regular sewing thread. For heavier embellishments, consider using fabric or interfacing for stability.

·         Layering: Stitching can be used to attach collage elements, fabric patches, or paper strips, adding both structure and visual interest.

·         Edges and Borders: Decorative stitches like zig-zag or blanket stitch can be used to finish edges, frame sections, or create interesting page borders.

·         Binding: You can sew signatures (groups of pages) together or even create fabric-covered art journals using sewing techniques for the covers and spine.

Creative Inspiration

·         Use stitching to attach meaningful mementos, fabric scraps, or textured papers.

·         Experiment with colored threads to create contrast or highlight important areas.

·         Try “slow stitching” as a mindful, calming practice-perfect for on-the-go journaling.

·         Let loose threads, knots, and irregularities become part of the art, adding character and narrative.

Final Thoughts

Stitching in art journals is more than just a decorative technique-it’s a way to infuse your pages with emotion, intention, and a unique tactile quality. Whether you’re outlining, embellishing, or binding, each stitch becomes a mark of your creative journey

Thursday, January 16, 2025

Capture Your Winter Wonderland Memories: The Ultimate Snow Day Photo Album!


Capture Your Winter Wonderland Memories: The Ultimate Snow Day Photo Album!


Capture Your Winter Wonderland Memories: A DIY Snow Day Paper Photo Album Tutorial

Preserving your snow day memories in a handmade paper photo album is a creative and personal way to cherish those magical moments. Follow this step-by-step guide to craft your own photo album and stick your photos in style!


What You’ll Need

  • Photos of Your Snow Day: Printed in various sizes for variety.
  • Cardstock or Thick Paper: For the pages of your album.
  • Decorative Paper: For the cover or embellishments.
  • Glue Stick or Double-Sided Tape: For sticking your photos.
  • Scissors or Craft Knife: To trim photos and paper.
  • Hole Punch and Ribbon/String: For binding the album.
  • Markers, Stickers, and Washi Tape: For decoration.
  • Optional: Stamps, glitter, or pressed leaves for extra flair.

Step 1: Create the Album Pages

  1. Cut the Cardstock: Decide on the size of your album (e.g., 6x6 inches or 8x10 inches) and cut your cardstock accordingly.
  2. Prepare Enough Pages: Include enough sheets for all your photos, plus a few extra for decorative title or memory pages.

Step 2: Design the Cover

  1. Use thicker paper or cardboard for the cover.
  2. Decorate it with winter-themed stickers, handwritten titles like "Snow Day Memories", or cutouts from decorative paper.
  3. Add the date of your snow day for a personal touch.

Step 3: Bind the Album

  1. Punch two or three evenly spaced holes along the left side of your pages and cover.
  2. Thread ribbon or string through the holes and tie securely. Adjust the tightness to ensure the album can open and close easily.

Step 4: Arrange and Stick Your Photos

  1. Plan the Layout: Before gluing, lay out your photos on each page to decide on the arrangement.
  2. Stick Photos: Use a glue stick or double-sided tape to attach the photos to the pages. Ensure they’re firmly secured.
  3. Leave space for captions or decorative elements around each photo.

Step 5: Add Personal Touches

  1. Write captions under the photos to describe the moment or your feelings.
  2. Use washi tape to frame photos or create borders.
  3. Add stickers, glitter, or small pressed leaves for a wintery vibe.
  4. Create themed pages, such as "Building a Snowman" or "Sledding Adventures."

Step 6: Include Memory Pages

Dedicate a few pages to other snow day memorabilia:

  • Quotes or Journal Entries: Write about what made the day special.
  • Small Keepsakes: Attach items like a piece of ribbon from your winter scarf or a drawing from a child.
  • Decorative Sections: Use stamps, doodles, or printed winter illustrations.

Step 7: Final Touches

  1. Flip through the album to ensure everything is secure.
  2. Add any final decorations to the cover or inside pages.
  3. Tie the ribbon or string tightly, and trim any excess for a neat finish.

Why Make a Paper Photo Album?

A paper photo album is more than just a place to store pictures—it’s a personalized keepsake that reflects your creativity and the joy of your snow day. Unlike digital albums, this tactile experience brings memories to life every time you turn the pages.

So, gather your supplies, print those snowy snapshots, and start crafting your ultimate snow day photo album. Your winter wonderland memories deserve to shine!

What’s your favorite way to decorate a photo album? Share your tips in the comments!


 Happy creating, and don’t forget to let your imagination grow! 🍄✨

Follow me on InstagramFacebookPinterest, and YouTube

I get asked a lot about where to purchase the supplies I use in my videos and blog posts. I list all the supplies I use at the end of my posts (below) 

SUPPLIES